May, 2020: Shikangania Community, Abungana Spring Project Complete!
Please note, all photos in this report were taken before social distancing recommendations went into effect.
Shikangania Community now has access to clean water! Abungana Spring has been transformed into a flowing source of water thanks to your donation. We protected the spring, constructed 5 sanitation platforms for different households in the community, and we trained the community on improved sanitation and hygiene practices.

Community members fetch water and make a splash at completed Abungana Spring.
"Owning a spring is something good, and I am glad to be part of the people who have benefited from this project. This spring will reduce the spread of waterborne diseases and give easy access to clean and safe water," said Mark Abungana, the spring's landowner.

Protected Abungana Spring
Preparing for Spring Protection
Community members worked together to source and carried all locally available construction materials to the spring. These included bricks, sand, stones, and fencing poles. Some people also chiseled away at large stones to break them down into gravel. Because people have to carry most items by hand, the materials collection process can take anywhere from a few weeks to months.
When everything was prepared, we sent a lorry to the community to deliver the rest of the construction materials, including the cement, plastic tarps, and hardware. Then, our artisan and field officers deployed to the spring to begin work. While the field officers traveled to and from the site each day throughout the construction process, the artisan remained in the community. Households provided meals and a place to sleep each night for the artisan.
The last step before construction commenced was taking a water sample from the unprotected spring. We sent the sample to a government laboratory for testing to identify the kinds of contaminants in the water before its protection. These often include fertilizers and pesticides from farms, animal and human feces, and any number of harmful bacteria. We then shared the test results with the community to identify extra steps they could take to help ensure the spring's water remains clean and safe after protection.
From Open Source to Protected Spring: A Step-by-Step Process
At last, it was time to dig in at the spring! Women and men lent their strength to the artisan each day to help with the manual labor. First, we cleared and excavated the spring area. We dug a drainage channel below the spring and several surface runoff diversion channels above and around the spring—this helps to divert the environmental contaminants identified in the pre-construction water quality test.

Excavation begins at the spring site.
To ensure community members could still fetch water throughout the construction process, we also dug temporary diversion channels from the spring's eye around the construction site. This allowed water to flow without severely disrupting community members' water needs or construction work.

Artisan stands on a tarp and wire foundation while pouring concrete.
Excavation created space for setting the spring's foundation made of thick plastic tarp, wire mesh, concrete, and waterproof cement. After setting the base, we started brickwork to build the headwall, wing walls, and the stairs.

Catch! Brickwork begins on top of the concrete foundation.
Next, we began one of the most crucial steps of spring protection to ensure a fully functional water point: setting the discharge pipe. The discharge pipe has to be set low enough in place in the headwall so that the water level inside never rises above the spring's eye, yet high enough to leave 18-20 inches between the pipe and the spring floor to allow room for the average jerrycan (a 20-liter container) to sit beneath the pipe without making contact.

Wall construction
If the discharge pipe were placed too high above the spring's eye, too much backpressure could force the flow to emerge elsewhere. Too low, and community members would not be able to easily access the water. We embedded the pipe using clay (or mortar when the clay is in short supply) and placed it at a slight incline to ensure water flows in the right direction.

Setting the discharge pipe.
In coordination with brickwork, we pitched medium to large stones on both sides of the spring's drainage channel. We then cemented and plastered each stone group into place, forming the rub walls. These help to discourage people and animals from trying to stand on that area, which could cause soil erosion and, thus, a clogged drainage area.

Cementing in the stone pitching to form a rub wall
With brickwork and stone pitching completed, we turned to cement and plaster both sides of the headwall and wing walls. This reinforces the brickwork and prevents water in the reservoir from seeping through the walls. In turn, this builds enough pressure in the reservoir box to push water out through the discharge pipe.

Plasterwork
As the headwall and wing walls were curing, we cemented and plastered the stairs and installed 4 tiles beneath the discharge pipes. The tiles protect the concrete from the erosive force of the falling water, beautify the spring, and facilitate easy cleaning of the spring floor.

Stair construction
With the tiles in place, we transitioned to the final stages of construction - backfilling the reservoir box. First, we cleared the collection box of any debris that may have fallen in since its construction, such as dead leaves or other items. Then we redirected the temporary diversion channels back into the reservoir box, channeling water into this area for the first time. We closed off all of the other exits to start forcing the water through the discharge pipe only.

Tile setting
With much help from the community, we filled up the reservoir area with the clean and large stones they gathered, arranging them in layers like a well-fitting puzzle. We covered the stones with a thick plastic tarp to minimize potential sources of contamination from aboveground, followed by a layer of soil. We piled enough soil on top to create a slight mound to compensate for the backfill's future settlement.

Backfilling with stones
Community members transplanted grass onto the backfilled soil to help prevent erosion. Finally, the collection area was fenced in to discourage any person or animal from walking on it since compaction can lead to disturbances in the backfill layers and potentially compromise water quality.

Planting grass at the spring
The entire construction process took about 2 weeks of work and patience to allow the cement and plaster to finish curing. As soon as it was ready, people got the okay from our field officers to begin fetching water. We met them there to celebrate this momentous occasion. Happiness, thanksgiving, and appreciation were the order of the day flowing in all directions.

Fetching water at the completed spring
Sanitation Platforms
All 5 sanitation platforms have been completed and handed over to their new owners. These 5 families are happy about this milestone of having a private latrine of their own and are optimistic that people will no longer leave waste outdoors. We are continuing to encourage families to finish building walls and roofs over their new latrine floors, and for other families to replicate the design after having helped construct these examples.

Representing the rest of his family, a new sanitation platform owner
New Knowledge
Community member Jared Eboi helped organize the training in coordination with our team. Together we found the community's preferred date for training while considering other events in the community calendar such as the agricultural season and expected gatherings. When the day arrived, the lead field officer for the project Victor Musemi deployed to the site with a team.

Training begins with Facilitator Victor Musemi
22 people attended training, which happened to be on a sunny and calm day. The weather made us look for a shade around the spring, which was safe and favorable for the training. We found a good spot under a tree where we sat and started off the training since we needed a place near the spring for practicals, and it was indeed conducive.

Victor teaches the 10 steps of handwashing.
We covered several topics including community participation in the project; leadership and governance; personal and environmental hygiene; water handling and treatment; operation and maintenance of the spring and sanitation platforms; dental hygiene; the 10 steps of handwashing, and how to make and use a tippy tap and leaky tin. During the leadership and governance session, we held an election for the leaders of the newly formed water user committee.
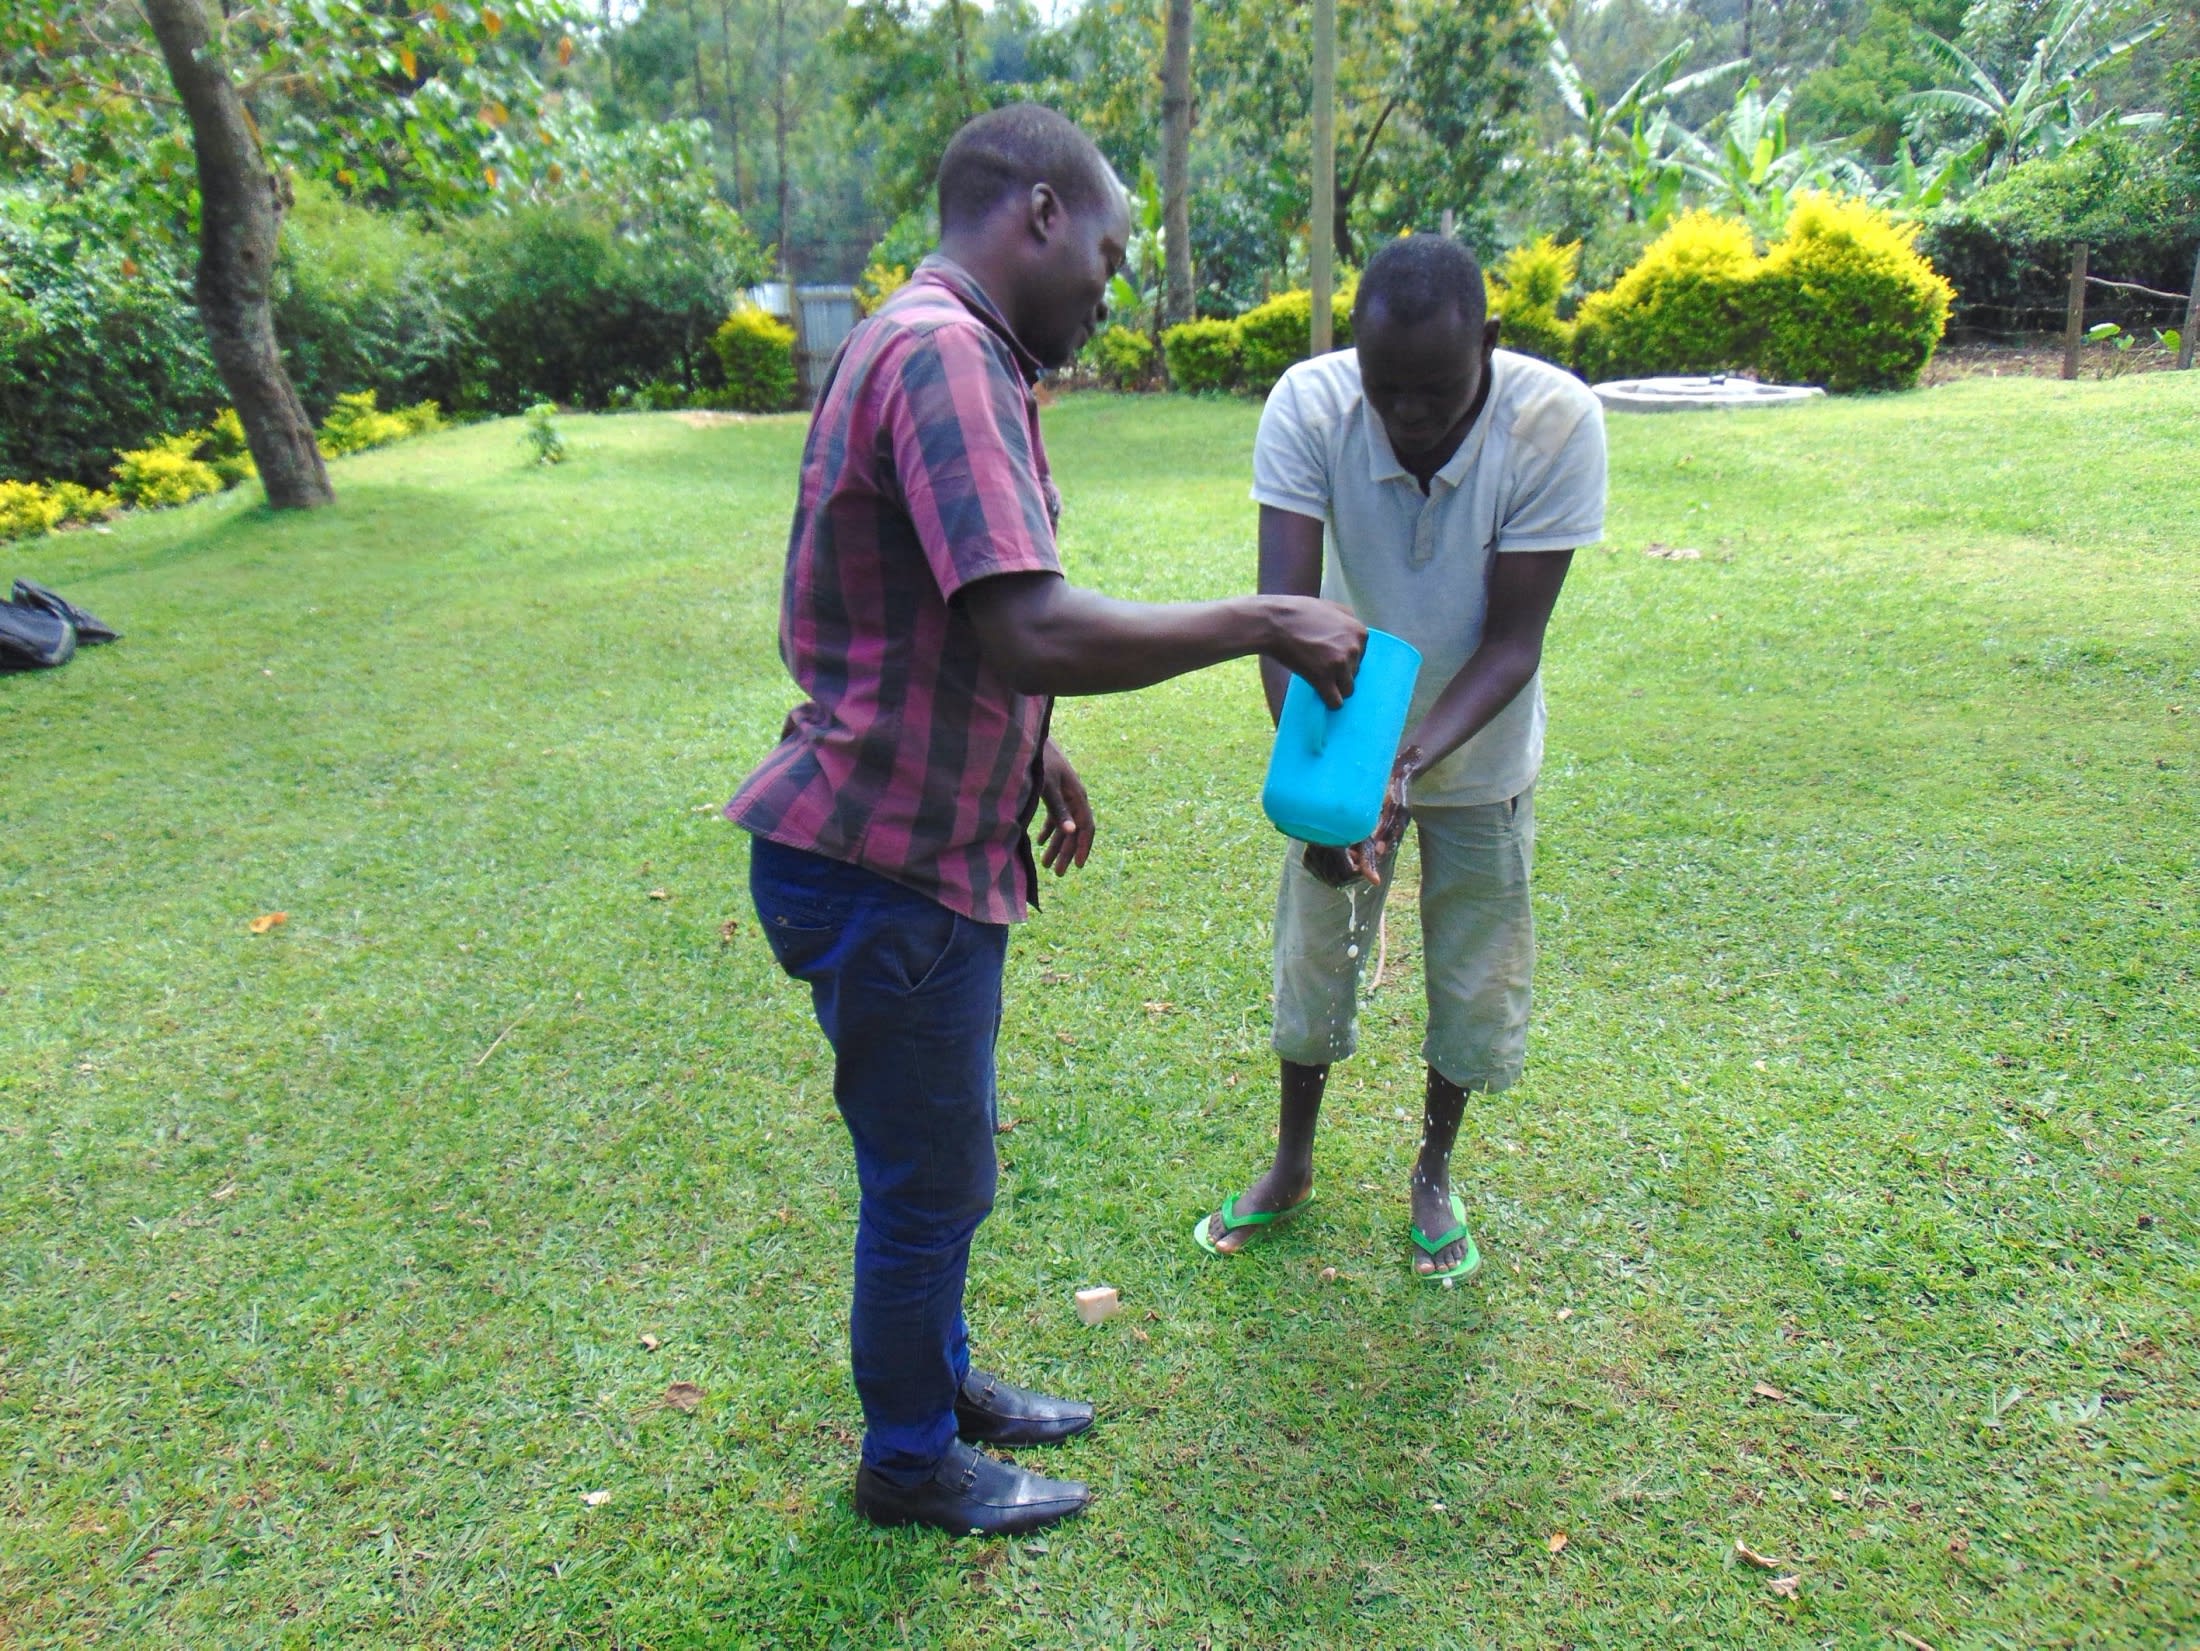
Trainer Victor pours water for a community member as he washes his hands.
We also brainstormed income-generating activities that can be used to start both a community savings account for any future minor repairs to the spring, as well as a cooperative lending group to enable members to develop their own small businesses.

Group discussions at the spring using diagrams to learn about good site management and safe water practices
Because we held this training when the spread of COVID-19 was still in its early stages and was not yet worldwide, this was not a topic we covered. Since then, however, we have developed trainings exclusively on COVID-19 prevention and awareness - see for yourself what we've been up to more recently as we continue to fight COVID-19 on the frontlines in all of the communities we serve.

A community member holds a diagram to present his group's findings.
The participants were very attentive due to the facilitators randomly asking questions and looking for answers throughout the day. Humor from some participants who did a presentation on dental hygiene and handwashing kept everyone awake and engaged. The level of participation from all who attended was good, the facilitators reported.

A participant stands to demonstrate her toothbrushing skills.
One of the most memorable topics was dental hygiene. When asked, the participants named the various dental diseases, including their causes and prevention. When asked for a volunteer to demonstrate toothbrushing, there was both a teenager and a 3-year-old girl who came in front to demonstrate when her mom was too shy to do it. It was a great moment for feedback and learning on gentle toothbrushing techniques.

A participant responds to Trainer Victor at the spring.
Handwashing was another special topic. We asked the members how they wash their hands, and when they do it. We later showed them the 10 handwashing steps to ensure every part of the hand is washed to remove any germs. One participant asked why he was washing his hands when there was no meal. Though the participant was joking, he looked very serious, thus left everyone started laughing!

Everyone was happy to successfully complete training.
"We shall share what we have learned with our children who are in schools and members who are not here. I personally brush my teeth every day using the toothpaste, but I have never bothered to read the manufacturer's instruction, but due to this training I have known the consequences of not reading the instructions given," said Catherine Abungana, the spring's landowner along with Mark Abungana, referring to the recommendation to store toothpaste in a cool, dry place.

A man smiles at the newly protected spring.
When an issue arises concerning the water project, the water user committee is equipped with the necessary skills to rectify the problem and ensure the water point works appropriately. However, if the issue is beyond their capabilities, they can contact our team of field officers to assist them. In addition, we will continue to offer them unmatchable support as a part of our ongoing monitoring and maintenance program.
Thank you for making all of this possible!

 Protected Spring
 Rehabilitation Project

